What is Tensile Testing & Why it Matters in Materials Labs

An Introduction to Tensile Testing
Have you ever wondered if the material chosen for a project is well-suited for a product's application? Luckily, material testing allows for benchmarking a material's performance under certain load conditions. This helps designers choose the proper materials without overdoing it on the performance side, ultimately saving money by selecting the appropriate material. It also allows for quantitatively comparing the physical properties of dissimilar materials.
Tensile testing is a way to understand a material's mechanical properties. It works by pulling a material until it breaks, showing its strength (ultimate tensile strength), stretchiness (elongation), and stiffness (modulus of elasticity). This test is useful in material science, engineering, and especially for quality control in plastics.
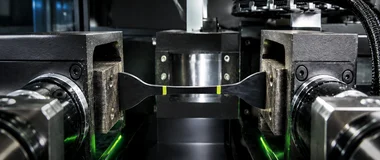
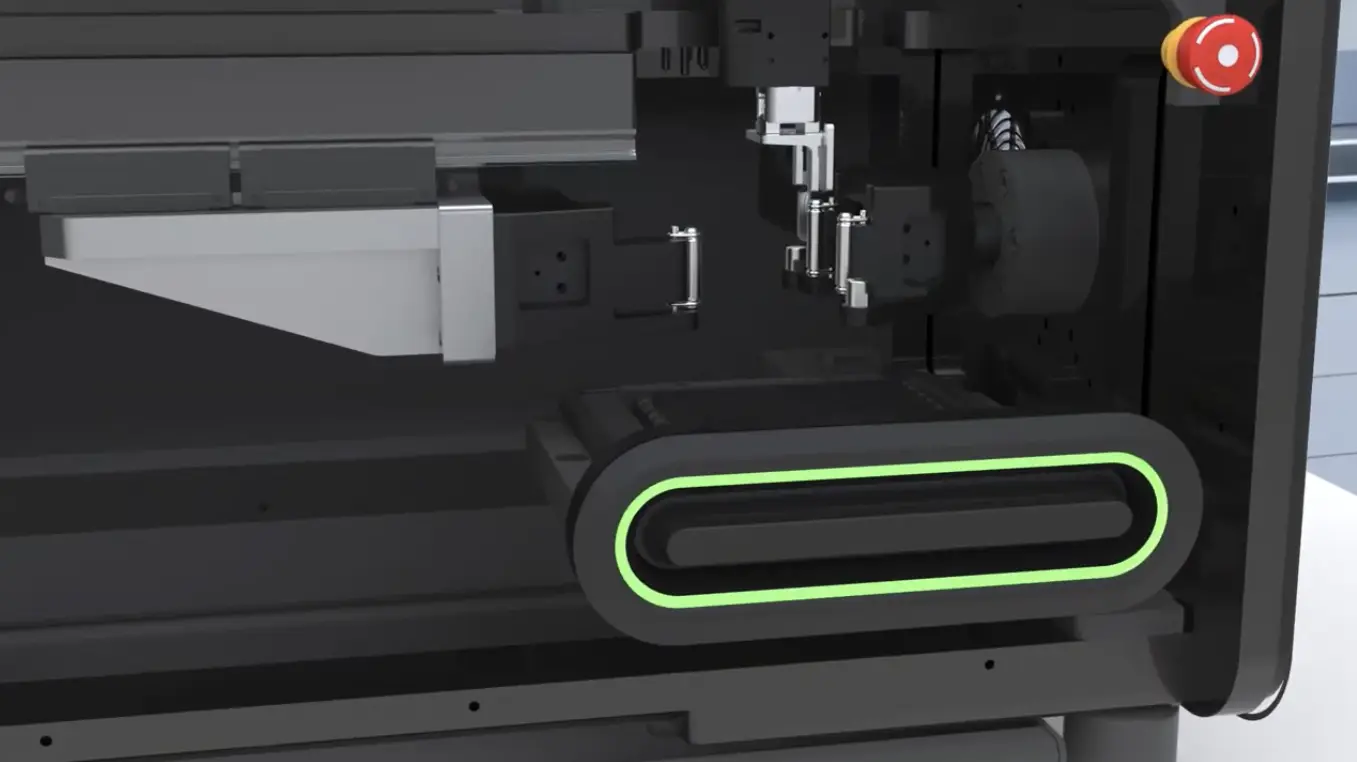
This article introduces tensile testing, its applications, common laboratory challenges, and practical solutions for obtaining accurate results. Fig. 1 illustrates an automated tensile test performed using the CubeOne system.
.gif)
What is Tensile Testing?
Tensile testing is a fundamental mechanical test where a material specimen is pulled until it breaks, revealing how it reacts to stretching forces. This process provides crucial data like stress, strain, and elongation, from which key material properties such as ultimate tensile strength, yield strength, and modulus of elasticity are determined.
Key Principles and How it Works
Testing relies on standardized methods:
Understanding Engineering Stress and Strain
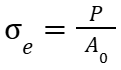
For most practical applications, engineering stress (σe) and engineering strain (εe) are used. They are both calculated based on the original dimensions of the specimen's gauge length:
Engineering Stress: Applied load divided by original cross-sectional area.
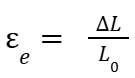
Engineering Strain: Change in length measured by extensometer divided by original gauge length
Key Material Properties Measured
A stress-strain curve is plotted from the data, illustrating the material's behavior. On this curve, strain is plotted on the X-axis and stress on the Y-axis, revealing:
- Ultimate Tensile Strength (UTS): The maximum stress the material withstands before fracturing.
- Yield Strength: The stress at which permanent (plastic) deformation begins.
- Fracture Stress/Strength: The stress on the material at the exact moment of fracture.
- Elongation at Break: The percentage increase in length at fracture, indicating ductility.
- Strain at Break: The strain value on the stress-strain curve at the point of fracture, representing the total deformation undergone before breaking.
- Young's Modulus (Modulus of Elasticity): A measure of the material's stiffness or resistance to elastic deformation.
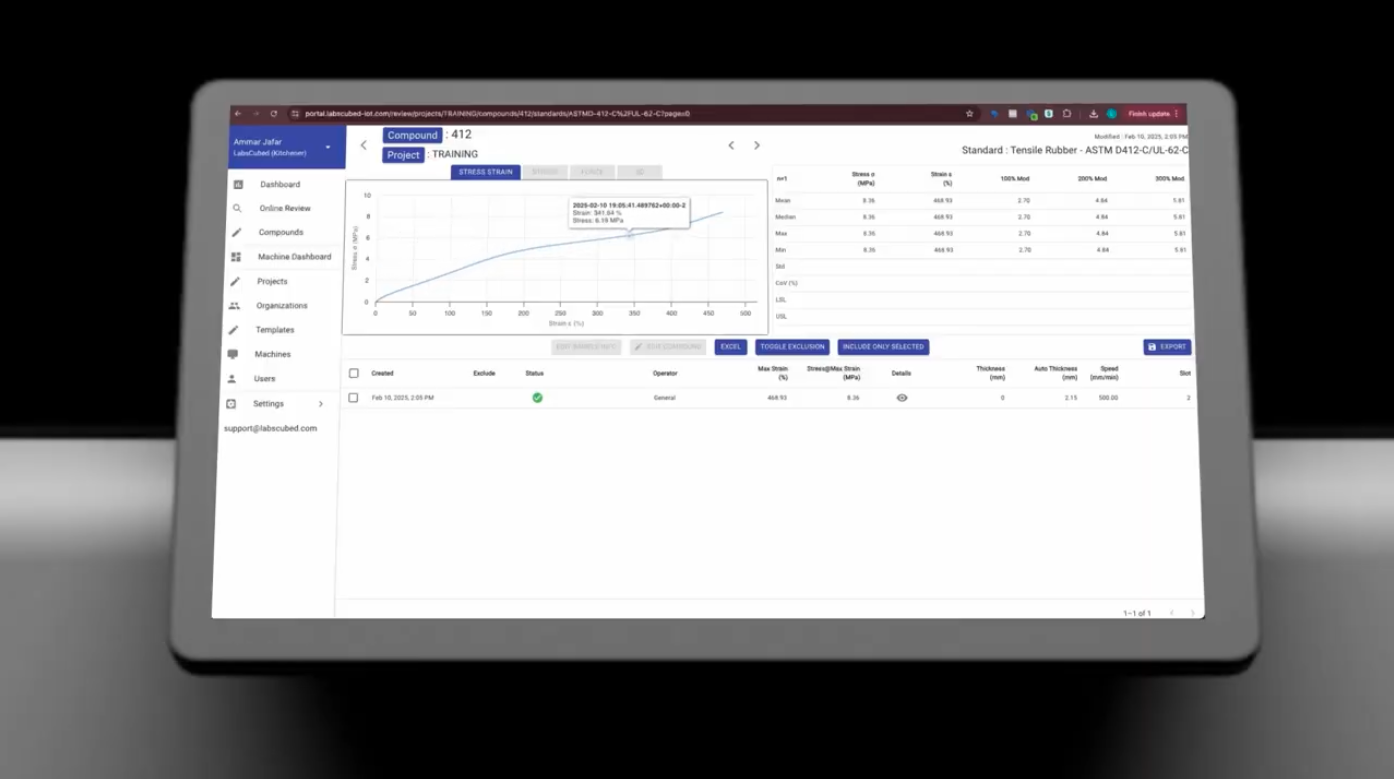
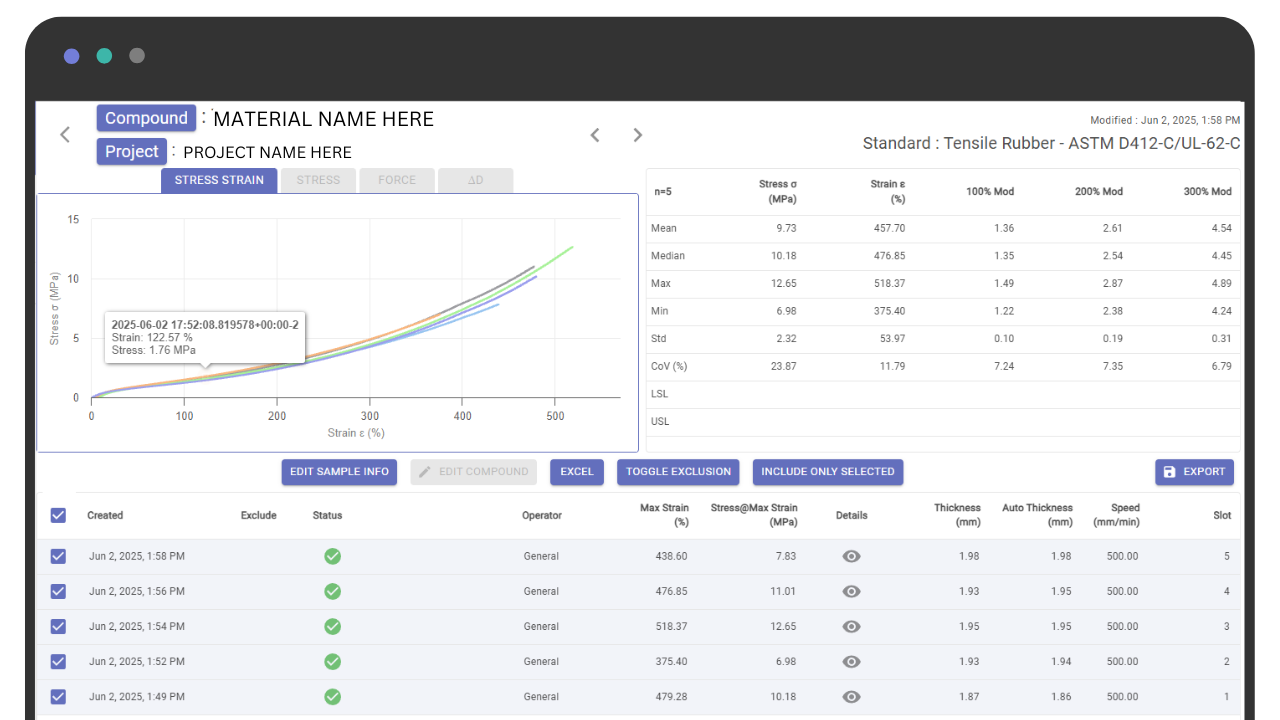
If using a CubeOne or CurbeTen system, all test results can be reviewed, compared, and exported via the LabsCubed Portal, seen in Fig. 2.
Understanding Stress-Strain Curves Across Material Types
The interpretation of stress-strain curves varies depending on the material type and applicable testing standard. For rigid materials such as metals or thermoplastics (e.g., tested under ASTM D638), the curve is typically divided into two regions:
- an elastic region (the most linear section at the start of the test), where the material returns to its original shape after the load is removed, and
- a plastic region, where permanent deformation begins.
The transition point between these regions is defined as the yield point (or yield stress), often determined using a 0.2% offset method. This method finds the yield point by drawing a line parallel to the elastic region of the curve, offset by a small strain (commonly 0.2%). The yield point is critical for assessing when a material will begin to deform irreversibly under load.
In contrast, elastomers and rubbers (e.g., tested under ASTM D412) behave quite differently. These materials are highly hyperelastic and may stretch several hundred percent without permanent deformation. Their stress-strain curves do not typically exhibit a distinct plastic region or clear yield point. Instead, they remain elastic until they break, often failing directly from the elastic phase. As a result, standards like ASTM D412 emphasize tensile stress at specific elongation levels (e.g., 100%, 200%, 300%) rather than defining yield stress. This approach enables comparison of material stiffness and rigidity under large, reversible deformations.
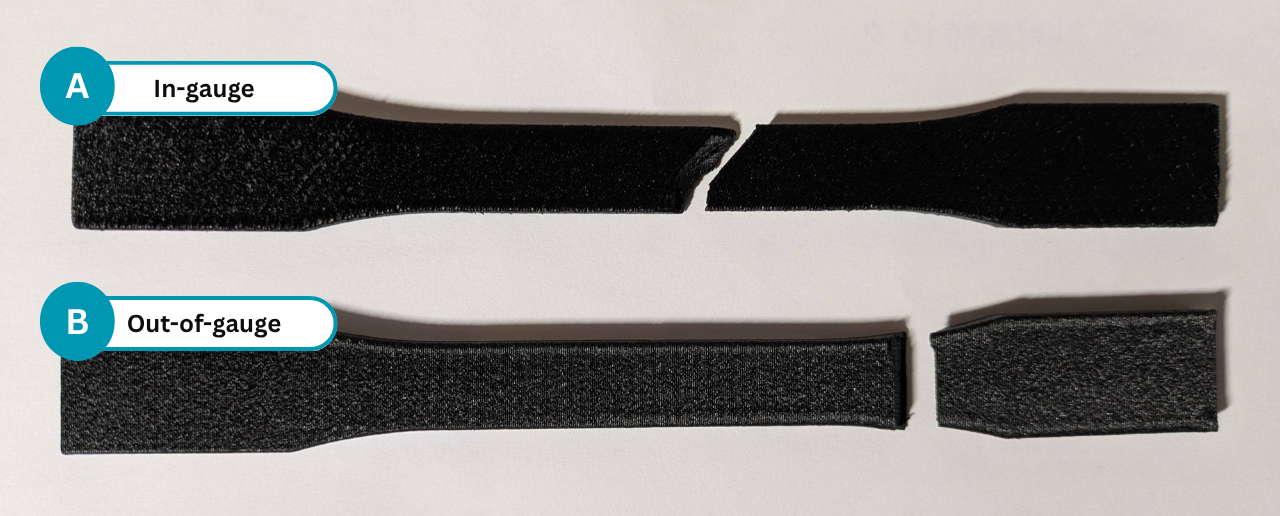
Validating Test Results: The Importance of Gauge Length Failure
For valid results, the specimen must fracture within its gauge length. If breakage occurs outside this area (e.g., at the grips), the test is considered inconclusive and must be re-performed, as improper gripping or stress concentrations likely influenced the failure. Fig. 3 shows an example of an out-of-gauge failure in a 3D-printed ASTM D638 tensile specimen.
Where is Tensile Testing Used?
Tensile testing is a key tool used across many industries. It helps make sure materials are strong enough and products work as they should. It's essential for:
Tensile testing provides key mechanical property data used in industries like automotive, consumer goods, composites, and additive manufacturing for material selection and quality control.
Sticking to ASTM/ISO tensile standards for various materials is crucial. This guarantees reliable, comparable test results, simplifying material selection for different use cases.
Lab Challenges in Tensile Testing & Solutions
Tensile testing presents several common challenges in laboratory environments, including specimen variability, equipment accuracy, human error, data interpretation, and the costs associated with tools and high test volumes. Additionally, handling complex materials, like soft rubbers or high-strength plastics, can further complicate the process.
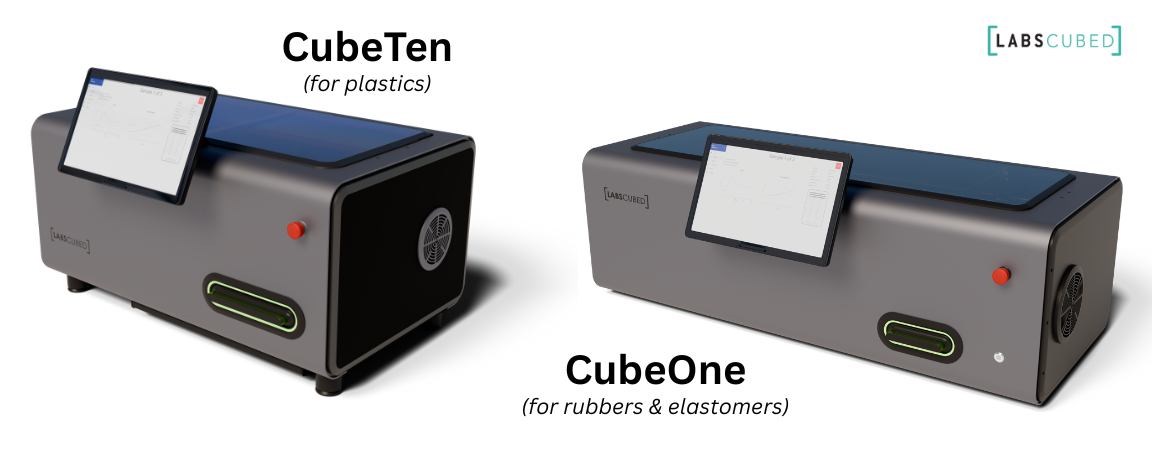
These hurdles, outlined in Table 1 below, can significantly impact test consistency and throughput. One powerful way to mitigate these issues is through automation. CubeOne (for rubbers and elastomers) and CubeTen (for plastics) are automated tensile testers developed by LabsCubed (Fig. 4), specifically designed to tackle these challenges head-on and deliver precise, repeatable, and efficient results.
Here are some common hurdles in tensile testing and how LabsCubed automation systems solve them.
Conclusion
Tensile testing remains a cornerstone of material science, indispensable for ensuring product quality, safety, and innovation, especially with plastics and rubbers. While traditional methods present challenges, modern automation provides clear solutions.
LabsCubed's CubeOne and CubeTen automated tensile testers are designed to tackle these hurdles head-on.
By delivering precision, consistency, and efficiency, these systems can help labs overcome common issues and optimize their material testing workflows.
Watch the video below to discover how LabsCubed's CubeTen automates plastic testing in labs, saving 90% of time in repetitive lab tasks and providing 40% more data consistency.
Related Articles
More expert insights and practical solutions to advance your material testing expertise.
Robotic Material Testing: The Complete Guide to Automating Your Lab

Automated Tensile Testing: How Labs Cut Cycle Time Up to 85%
Composite Material Testing: Methods, Standards, and Automation

Tensile Testing Machine Guide for Plastics & Rubber Labs
ASTM D790/ISO 178 Explained: Everything You Need to Know About Plastic Flexural Testing

Fatigue Testing in Rubber Compounds: Understanding Long-Term Performance

How Temperature and Humidity Affects Tensile Strength in Plastics